The AFKPLUS plugin allows you to enter an AFK mode. An "AFK" title appears beside your name in the player list to show others that you are AFK. You automatically enter AFK mode after 2 minutes. However, you can manually enter the mode using /afk. While AFK, you cannot be attacked by mobs. However, other players can still attack you.
Used to prevent lots of block interactions like fences not connecting to each other, but that started causing issues so we turned it off. Now it just stops gravity blocks. Also lots of useful tools like:
To open the banner creator menu, type /banner
o open the armor color menu, type /armorcolor.
To open the secret blocks menu, type /secretblocks [Requires advanced tools permission]
To toggle night vision, type /nv.
To toggle noclip mode, which allows you to travel through blocks, type /nc.
To toggle advanced fly mode, which disables the fly speedup and slowdown, type /advfly.
The CustomHeads plugin allows you to add player heads to the game.
Type /heads to access the heads menu.
From there, you can choose from a large selection of heads.
You can also get the head of a specific player by typing /heads get <player>.
Hovering text.
This is an advanced tool. To use it, you must request access by filling out the form at advanced-tools-request.
The Dynmap allows you to view a map of the world in your browser that includes the live location of all players. You can also create markers on the map to mark important locations.
You can view the map using the links in the top navigation bar.
Your location is visible to other players by default. To toggle your location, use /dynmap hide and /dynmap show.
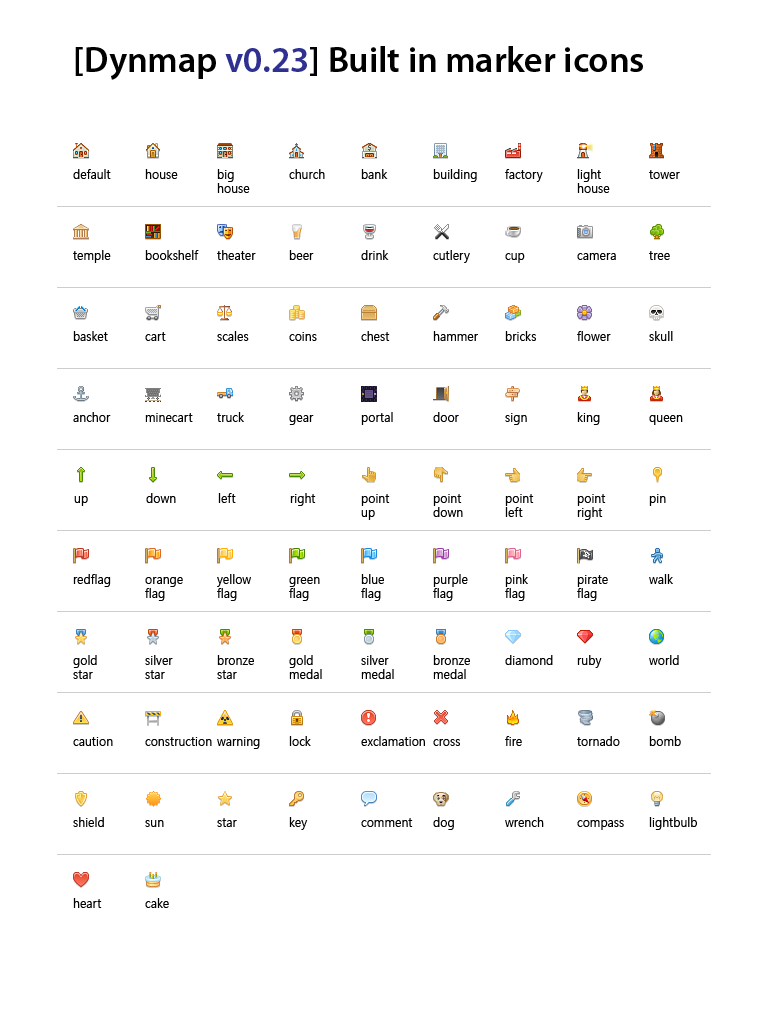
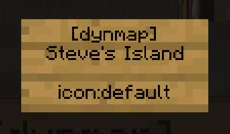
Place a sign to add markers to the map. On the first line, type [dynmap]. On the second and third lines, type the name of the marker. On the fourth line, type icon:<icon-id>. Break the sign to remove the marker from the map.
The Simple Elevators plugin allows you to create working elevators. The full list of commands can be found at the plugin's page linked above.
This is an advanced tool. To use it, you must request access by filling out the form at advanced-tools-request.
Rename your items with /rename. Remove the name with /removename
Set lore lines (purple tooltip text) with:
/lore <line1|line2|line3> Adds lore to the item in hand.
/setloreline <lineNumber> <text> Sets a certain line of lore on the item in hand.
/addloreline <text> Adds a line of lore on the item in hand.
/removeloreline <lineNumber> Remove a certain line of lore on the item in hand.
/insertloreline <beforeLineNumber> <text> Insert a certain line of lore on the item in hand.
/removelore Removes any custom lore from the item in hand.
Add or remove enchantment glow with /glow and /removeglow
Hide or unhide enchantment info tooltips with /hideenchantments and /unhideenchantments
Includes a large amount of functionality, especially thought extra plugins that extend it.
Campus server only: /item is a safer equivalent of /give
The VoxelSniper plugin allows you to make large-scale edits to the Minecraft world using a brush feature.
This is an advanced tool. To use it, you must request access by filling out the form at advanced-tools-request.
The FastAsyncWorldEdit plugin allows you to make large-scale edits to the Minecraft world using commands. You do not have access to all of the commands.
This is an advanced tool. To use it, you must request access by filling out the form at advanced-tools-request.
With the Graves plugin, items are stored in a gravestone that functions as a chest. You have 24 hours to get them back, and you can have a maximum of 18 graves at once. When you mine the gravestone, you are given 90% of the experience points (not levels) that you lost when you died. When you respawn after a death, you are given a compass that points to the location of your grave. Right clicking the compass gives you the number of blocks to your grave. The /grave command provides additional information about your graves.
The Gsit plugin allows you to use /sit, /lay, /crawl, /spin, and /bellyflop. You can also right click on stairs, slabs, or carpets to sit on them. Your hand must be empty for this to work.
In addition, you can right click players with an empty hand to ride them.
The Imagemaps plugin allows you to place any image into the game. To use it:
Submit your image for approval in the smp-imagemaps channel (we respond quickly)
Once approved, use the /imagemaps place command on the server:
/imagemap place <filename> [frameInvisible] [frameFixed] [frameGlowing] [size]
For example,
/imagemaps place bedrock false true true 4x3
will create an image that has the name “bedrock”, where the item frame IS NOT invisible, the frame IS fixed, the frame IS glowing, and has a size of 4 blocks wide by 3 blocks tall.
[frameInvisible] and [frameFixed] can be modified after the image has been placed. Right click the item frame using a wooden hoe to toggle [frameInvisible], and shift+right click the item frame to toggle [frameFixed].
The resolution of a 1x1 map is 128x128 pixels. To ensure your images appear high quality, consider scaling them to multiples of 128 before submission. For example, a 4x3 image would be 512x384 pixels.
The Individual Join Messages plugin allows you to have a customized message when you join and leave the server.
To set a custom join message, type /setjoinmessage <message>. To set a custom leave message, type /setleavemessage <message>
To use this plugin, you must become a VIP by donating at least $5 to the Minecraft Club.
Developed in-house by @Ilya (Cat6172).
The Light Cleaner plugin allows you to fix bugged lighting that sometimes occurs when using WorldEdit. To fix bugged lighting within your view radius, type /cleanlight. The full list of commands can be found at the linked page.
This is an advanced tool. To use it, you must request access by filling out the form at advanced-tools-request.
Campus server:
To teleport to the Campus world, /mvtp campus
To teleport to the creative plots world, /mvtp freebuild
To add anchors and other useful features, see the linked documentation. Not all features are enabled or accessible.
SMP server:
A temporary end dimension exists to allow players to explore end cities endlessly without bloating the world file size. This dimension is reset regularly. Use the teleporter under the end exit portal to travel there.
Removes the vanilla limit of 39 levels ("too expensive!") from anvils. If you have the levels, you can enchant it.
The Parties plugin allows you create private chat groups for factions.
To create a party, type /party create <name>. To join a party, you have to be invited by an existing party member with /party invite <username>. To kick someone from a party, type /party kick <username>. To leave a party, type /party leave.
You can switch between the global chat and party chat by typing /party chat. All of your messages will be sent in global chat or party chat, depending on which mode you are in. You can remain in global chat and send specific messages in party chat using /pc <message>. This is the same thing as /tell, except for parties.
You can set a description for your party by typing /party desc <description>. You can view the info for party by typing /party info <party>. You can list all online parties by typing /party list
The PlayerStats plugin allows you to view and share game statistics.
To view a statistic, type /statistic <statistic> <me / player / server / top>
When typing the command, it shows (tab-completes) the list of statistics to choose from. The server option shows the total amount for everyone in the server, whereas top provides the top 10 players.
Previously, you would be able to press the [share] button in chat to share your statistics. This was disabled due to a severe bug that would cause it to kick players.
The Playtime plugin allows you to view your total playtime on the server. To view your total playtime, type /playtime. To view the playtime of the top ten players on the server, type /playtime top
Integration between PlotSquared and Dynmap that shows claimed plots on the map
The PlotSquared plugin allows you to claim and modify build plots on the Freebuild world.
To claim the plot you are standing in, type /plot claim
Many useful commands can be found in the documentation. Some may require you to have advanced status.
The Pronouns plugin allows you to set your pronouns on the server and view other players' pronouns. To set your pronouns, type /pronouns set. To view another player's pronouns, type /pronouns view
The Self Control plugin allows you to tell the server to kick or tempban you at a given time.
Commands:
/kickme at [time]
/banme at [time]
The time is in h:mma format (ex. 1:34pm) in Mountain Standard Time. This will happen on the next instance of the given time only (will not repeat the next day).
/banme is a 1 hour temporary ban. Do not ask the moderators to unban you early.
Developed in-house by @Ilya (Cat6172).
With the TTV chat plugin, you can use Twitch emotes in the Minecraft in-game chat. They function just like they do on Twitch: just type the emote name.
The full list of emotes can be found with the /listemotes command in-game.
With the Simple Voice Chat plugin, you can use a built-in voice chat in Minecraft. This plugin supports proximity chat, meaning the farther you get away from other players, the quieter your voice becomes. It also has a Groups feature which is similar to a Discord voice chat, allowing you to talk with players from any distance in the game.
To use, all players who wish to talk to each other must install the mod (see client download link). Once in game, use V to open the main menu, and G to open Groups.
This mod is only available for Java Edition players.
The Wiki Integration plugin allows you to read pages from the SMP Wiki website from within Minecraft. This is a useful tool for new players to become familiar with the history of the server.
The command is /wiki <topic>, where the topic can be any wiki page. This includes player names, locations on the server, and lore events on the server.
You can read the full wiki linked on the top bar of the website.
Developed in-house by @Ilya (Cat6172).